
Corie Stolhand
rockrembrandt.com
Summer is here and it seems like an extended school break and bored kids go hand in hand. I am here to tell you about a fun activity that will help break that summer boredom and spark creativity with your kids.
Have you ever heard about rock painting or The Kindness Rocks Project? Rock painting has exploded in popularity over the past few years, both as an art form and activity. If you have found yourself staring at your 101st episode of CoComelon or stuck inside with a chorus of “I’m bored”, then maybe rock painting is just the activity for you.
Let’s start with The Kindness Rocks Project. This project encourages participants to paint positive messages and images on rocks and hide them around their community for others to find. Often, pictures of those rocks are posted on social media once they are found. Re-hiding the rocks is encouraged. Many cities have a Facebook page dedicated to rock painting or The Kindness Rocks Project. There’s a great one in Sapulpa called 918 Rocks! This is a wonderful activity that encourages outside play and creativity.
But where do you begin? I am glad you asked. I am going to walk you through the basic supplies you will need to start painting rocks and the process of creating and sealing them. Let’s get started.
Obviously, you will need rocks. You may have some in your yard or garden that would be perfect. Maybe a nature walk would be a great way to introduce this activity to your kids. Look for relatively smooth rocks. Smaller rocks are harder to paint. I look for ones that are at least a few inches across.
However, if you are looking for numerous rocks you might consider purchasing them. You can buy rocks in bulk at some landscaping companies. Another option would be to visit a home improvement store. You can also find rocks at hobby and craft stores. If none of these is an option for you, search “rocks for painting” online and you will find several options that you can order.
The next item you will need is paint. Paint can get a bit overwhelming as there are lots of options. I recommend starting with acrylic paint. Acrylic is water-based, so when kids are working with it you have a better chance of a fuss-free clean-up. Wipe down any surfaces that need to be cleaned with a damp rag. If necessary, add a drop of dish soap. Acrylic paint is ready to use, it does not need to be mixed with water.
You can find acrylic paint in many different brands and sizes. At a craft or hobby store, you will find it in two-ounce bottles. They can come in a set of colors or you can purchase one bottle at a time. Acrylic paints come in a wide variety of colors so you can get exactly what you need. They also blend well if you need to make a custom color. I recommend starting with a small set of your favorite colors and adding as needs or inspiration arise.
Don’t be overwhelmed by the many different brands of acrylic paint. If you are just starting, purchase paint at the price point that works for you. I have found that cheaper paint tends to be thinner, so if you are trying to cover a whole rock you will probably need a few layers.
Another option for coloring your rocks is using paint pens/markers. This can be more expensive than tubes of paint, but they are great for adding details on rocks. The markers are easier to control than paint and a brush, but with the difference in cost, this might not be the best option for a true beginner. I love using them myself and highly recommend investing in a set once your kids are painting regularly.
Paint brushes would be the next item you will need. Most craft stores will carry a “value” set of brushes that come in a variety of sizes and may include bristle and sponge tips. This is a great option for getting started. Brushes will wear if you paint a lot of rocks and may need replacing from time to time. Remember to wash your brushes right away after use. Keep some dish soap handy, this will make cleaning up a breeze. A little attention will save you dollars on brush replacement in the long run.
I recommend purchasing a spray acrylic sealer. This will be the clear coat that will help protect your art. Gloss or matte is completely up to you. When it comes to sealing your rocks, be sure an adult is performing or supervising this step of the process – it can get really messy! Clear acrylic sealers can be found at craft or home improvement stores. One can should be plenty – a little will go a long way here.
Other supplies that I recommend gathering are tablecloths (consider disposable ones), paper plates (these make great, disposable paint palettes) and cups of water for cleaning off brushes.
So now that you have gathered all of your supplies it is time to start painting; clear off your table, put down a tablecloth, spread out supplies and call the kids away from the TV.
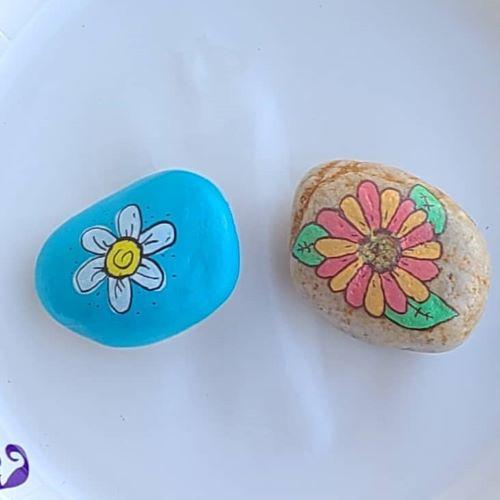
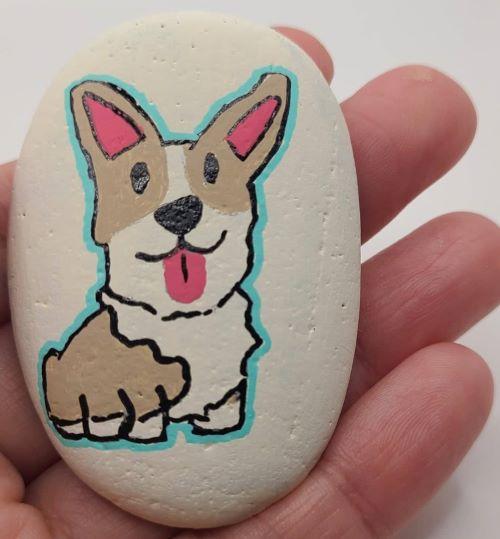
For little kids, you are probably going to just let them paint and have fun doing what they want. Let their imaginations run wild. Maybe you would like a little more organization. The easiest way to accomplish this is to have a theme. Keep it age appropriate. One time, the theme could be flowers, the next time fish, then zoo animals, etc. The possibilities are endless. Keep with your children’s favorite topics to hold their interest.
With my kids, I like to add an educational element to our projects. I find they’re more interested in learning when they can associate the subject with something they’re making. For example, we’ll paint flags and other patriotic symbols on the Fourth of July and discuss the American Revolution. This week we painted a lunar eclipse and discussed astronomy. The year is filled with holidays and anniversaries to create learning opportunities!
Many Kindness Rocks involve painting a positive phrase or word on the rock so that you can encourage others. This is also a great educational opportunity for the kids. Now you have found a way to practice spelling and handwriting while they are having fun and being creative.
Once the painting is done, let the paint dry completely. This can take a bit of time depending on how much paint was layered on the rock. Some kids like to slather on paint so be prepared to let a rock dry overnight.
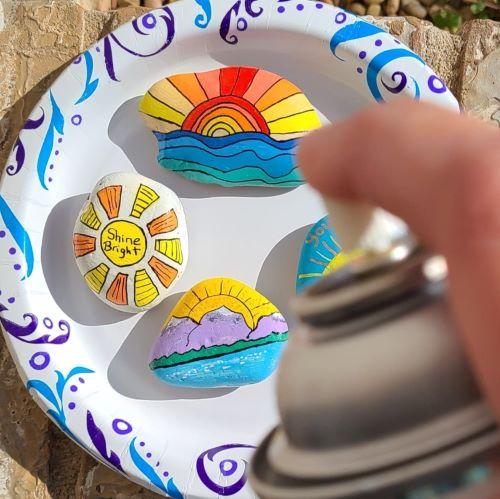
The next step is to seal. Sealing is important in rock painting; it helps protect your masterpiece from the elements and handling. As stated above, an adult should help with this step. Take the rock outside and put it on a protective surface, a paper plate is a great option. Spray a coat of the sealer on top of the painted rock and let it dry. Be sure to follow the directions on the sealer.
Finally, it is time to display or hide the rocks. If you decide to hide, put on some comfortable shoes and go for a walk. Do you have a favorite park or nature trail? These are perfect places to hide rocks. Maybe you will find a few while you are out and about. Be sure to snap some pictures and post them to your local rock painting groups’ page. If your area does not have a page, maybe you should consider starting one. Once others see the cute rocks flooding their social media, you will have many friends to paint and hide rocks with.
If you are looking for more information on rock painting or need ideas and inspiration on what to paint, you can visit my blog at rockrembrandt.com. I am continually adding new articles and ideas.
Remember, the most important part of rock painting is to have fun.